Add and Omit
The Add and Omit feature controls which fields appear on items within a specific node, letting you customize the data structure without affecting other parts of your map. This is how you tailor a node's data model to the needs of a particular team or program — adding mission-specific fields that matter locally while omitting fields that aren't relevant. The result is cleaner data entry for users and more focused analysis from Gary and SmartBoards.
When to Use This
Customizing a node's data model — Add fields specific to a program's needs (e.g., TRL level, funding line) while omitting irrelevant default fields.
Reducing clutter for users — Hide fields that don't apply to a node so data entry is faster and less error-prone.
Preparing data for AI analysis — Ensure each node captures the right fields for Gary and SmartBoards to produce meaningful outputs.
Opening List Options
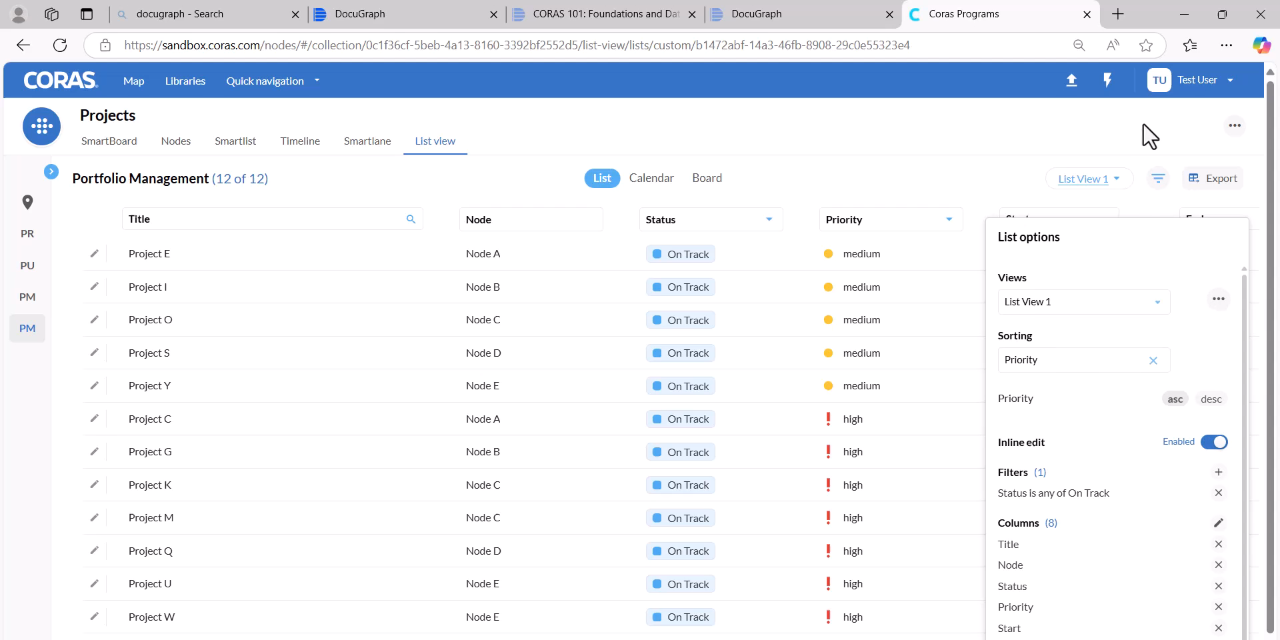
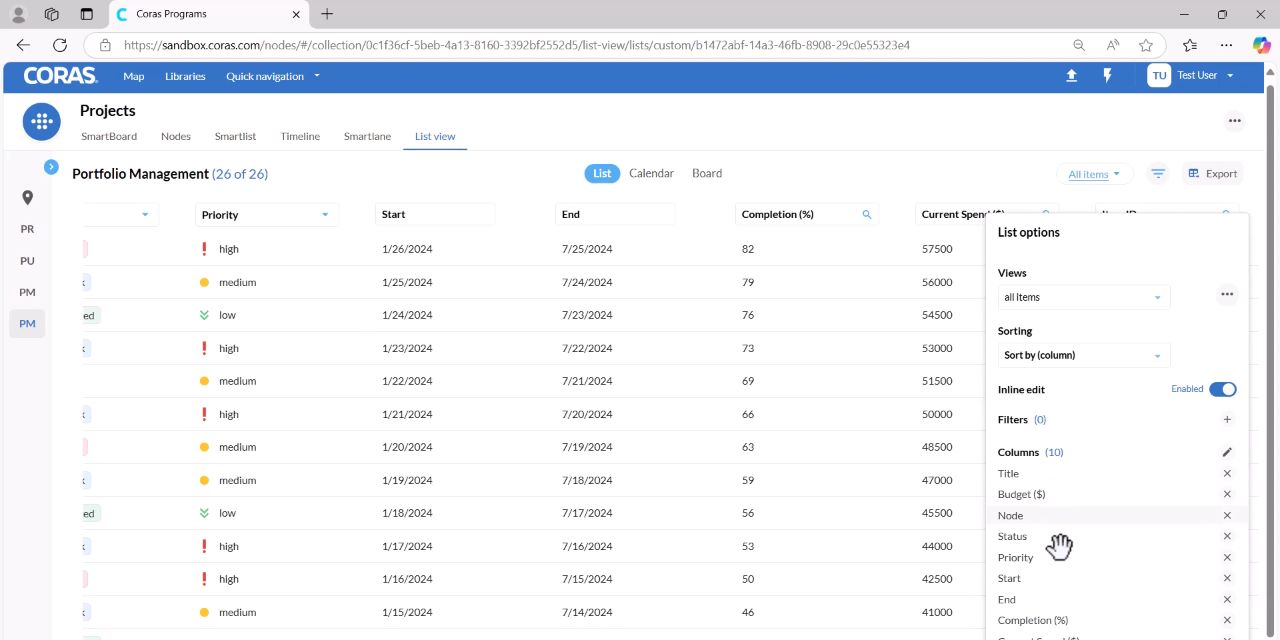
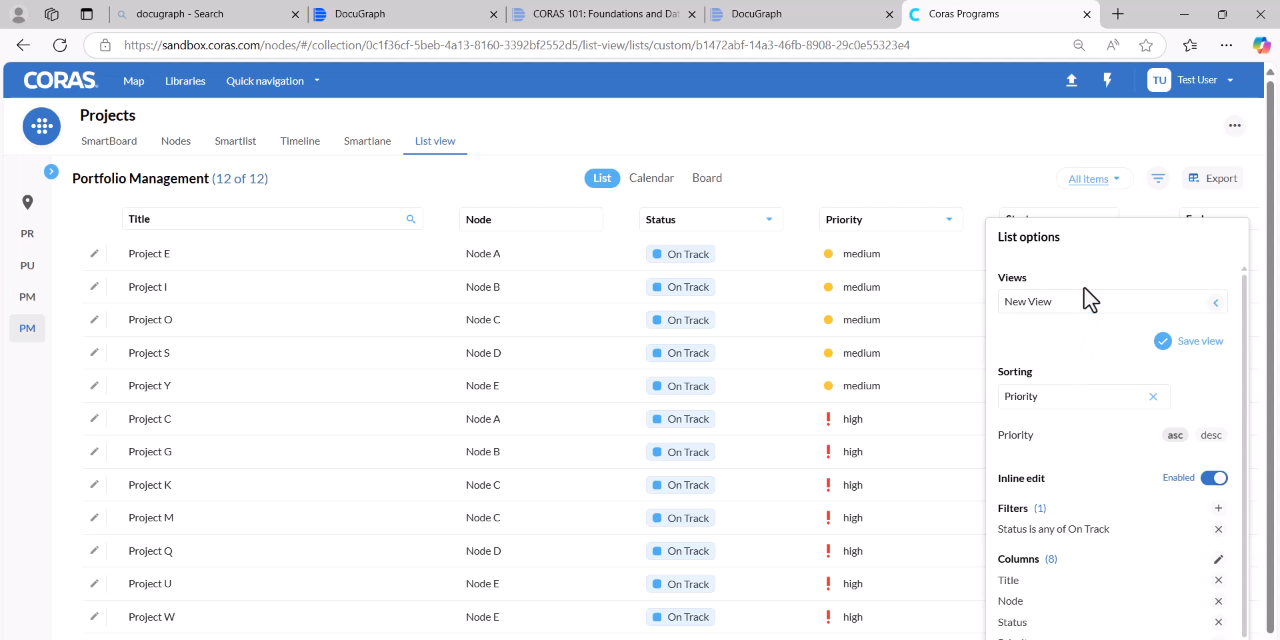
Click the tornado-shaped icon at the top right of your list to open List Options.
Navigate to the Column section.
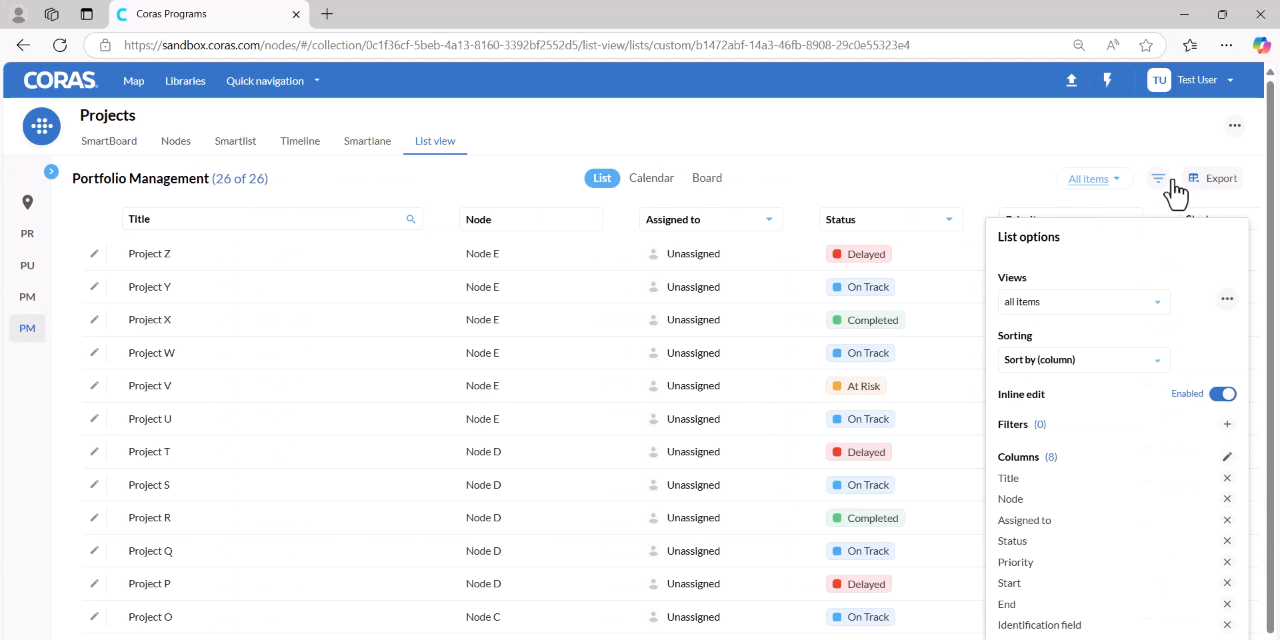
Omitting Fields
Click the X next to any field you do not want to appear in your list view.
The field is immediately removed from the visible columns.
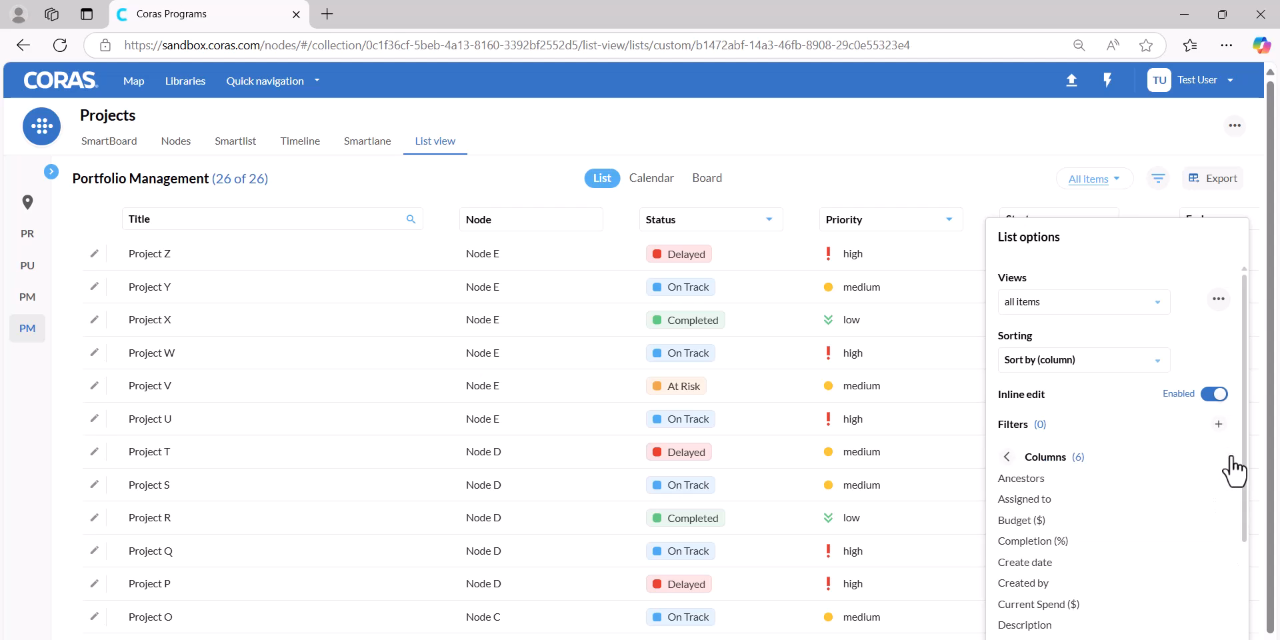
Adding Fields
Click the edit pencil icon in the Column section.
Select the fields you want to display on your list.
Scroll through the list to verify the omitted fields are hidden and the newly added fields are visible.
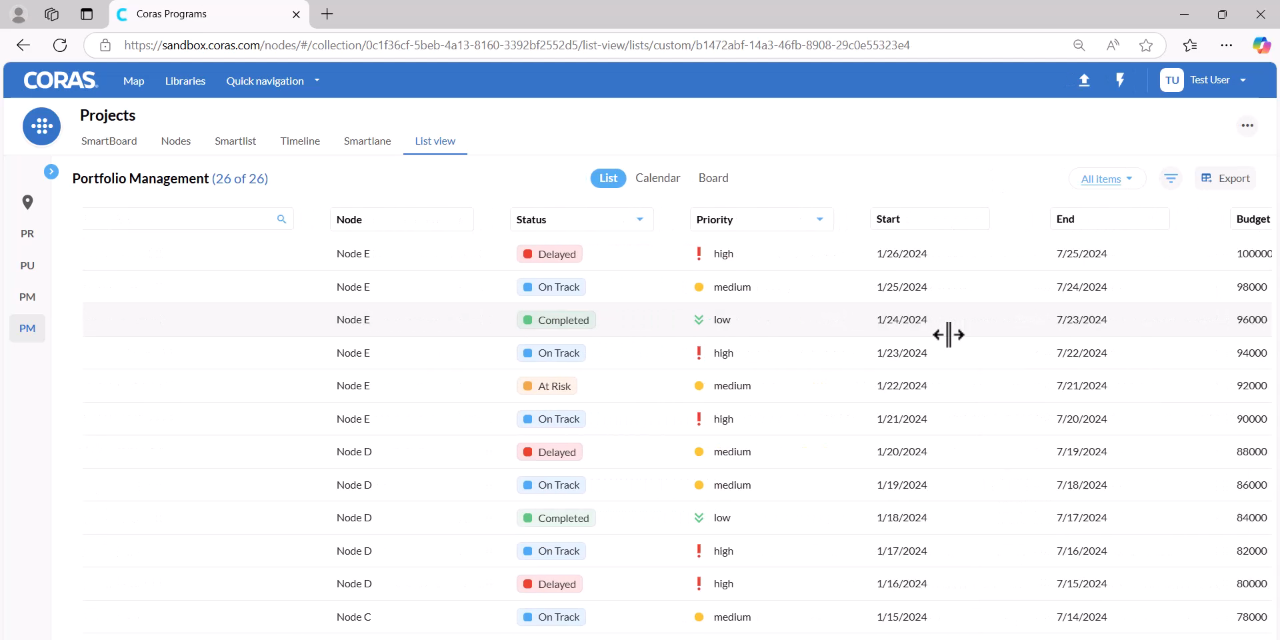
Rearranging Field Order
Open List Options by clicking the tornado icon again.
Click and drag fields within the Column section to reorder them.
Release the field in the desired position. The list view updates to reflect the new column order.
Adding Filters
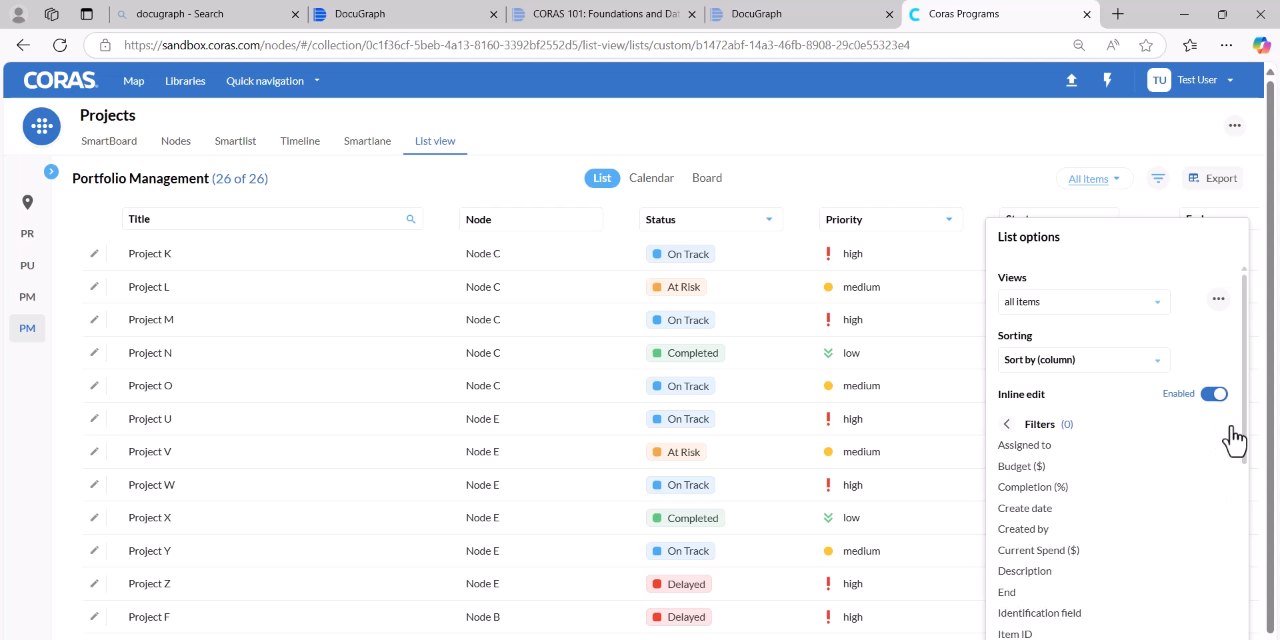
In List Options, click the plus sign next to Filters.
Select the field you want to filter by (e.g., Status).
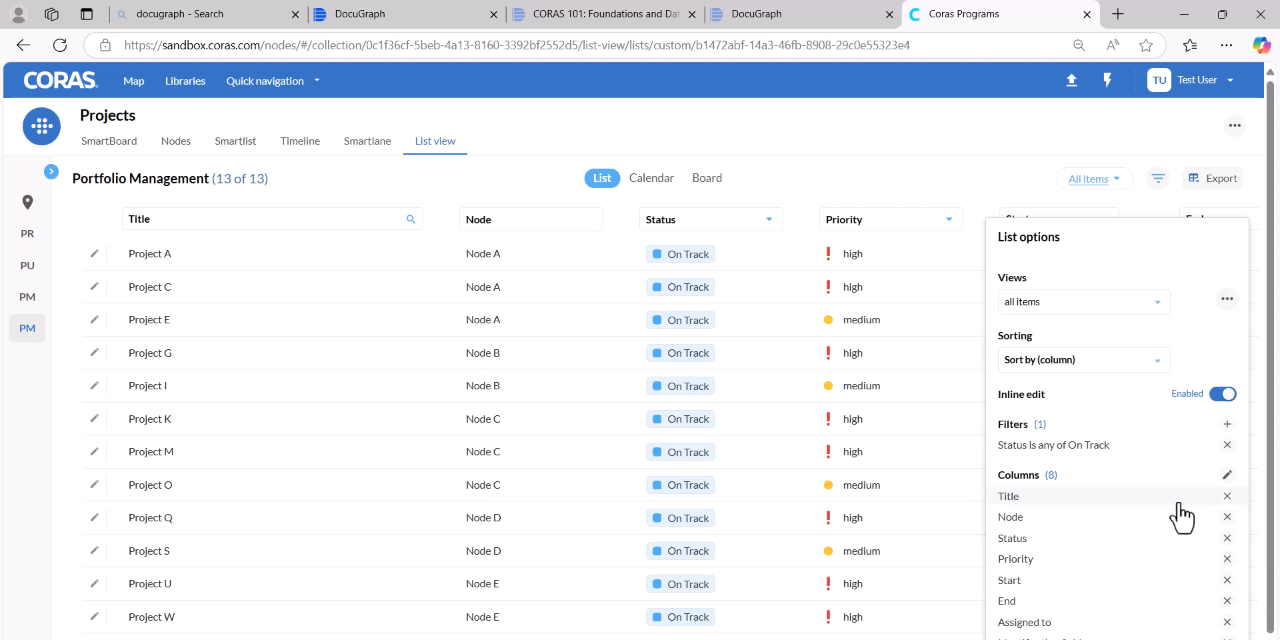
Set the filter parameters. For example, select is any of and then choose the desired status value.
Click Apply Filter. The list now displays only items matching the selected filter criteria.
Enabling and Disabling Inline Editing
Statuses and priorities can be changed directly within the list view. To disable this capability:
Open List Options.
Turn the toggle off next to Enable Edit.
Statuses and priorities are now read-only in the list view.
Turn the toggle back on to restore inline editing.
Sorting Items
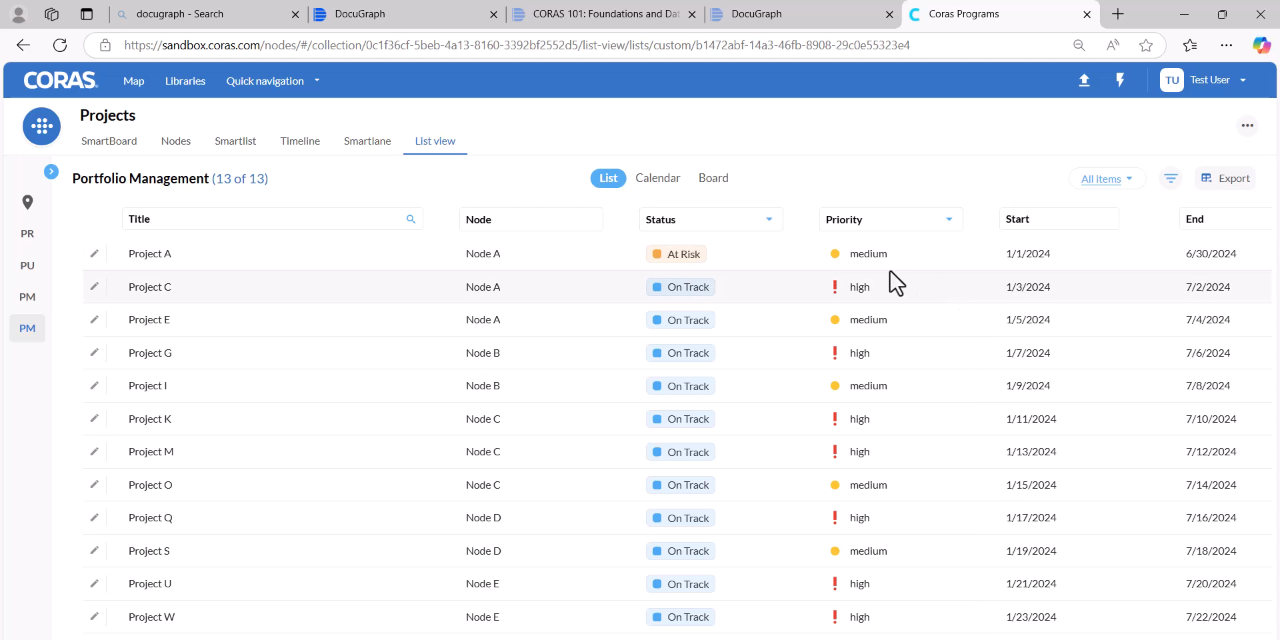
In List Options, locate the Sorting section.
Click a field such as Priority to sort items by that column.
The items in the list are now organized by the selected field.
Saving and Pinning a List View
Click the three dots menu at the top of the list.
Select Save, enter a title for your list, and click Save.
To pin the view, click the three dots again and select Pin View.
The saved list is now pinned to your list view. You can switch back to All Items at any time.