
Create and Configure an AI Agent
AI Agents are custom AI personas you configure to perform specific tasks, follow defined instructions, and communicate in a chosen style. Each agent can be scoped to specific lists, connected to validated prompts, tested before deployment, and exported for reuse across tenants. By customizing how an agent behaves and communicates, you align AI outputs with your team's standards and mission requirements.
Access AI Agent Settings
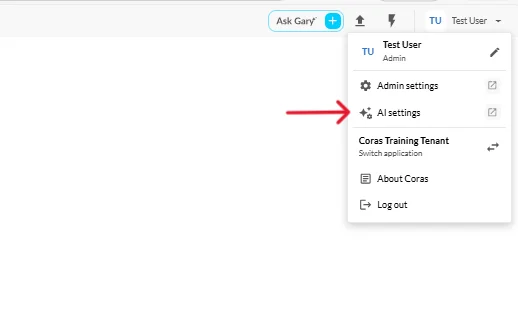
Go to the top right corner of the screen
Click the dropdown arrow next to your name
Select AI Settings
In the left-hand menu, click AI Agent
Create a New AI Agent
Click + Add Agent (top right of the page)
Complete all required fields:
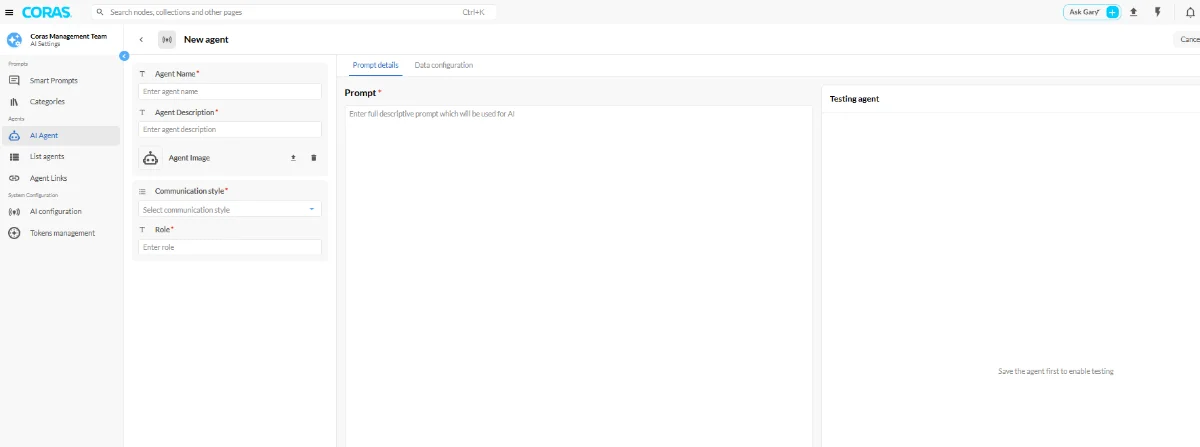
Required Fields (Must Be Completed)
Agent Name - Enter a clear name for the agent
Example: Chart SpecialistAgent Description - Briefly explain what the agent does
Example: Helps analyze charts and explain data trendsCommunication Style - Select how the agent should communicate:
Formal – Structured, serious, and professional tone; avoids casual language
Casual – Relaxed and conversational; more informal and easygoing
Professional – Clear, concise, and business-appropriate tone
Friendly – Warm, approachable, and supportive tone
Technical – Detailed and precise; uses domain-specific or technical language
Role - Define the agent’s role
Example: Analyze data and provide insightsInstructions - Enter a detailed prompt that tells the AI how to behave
Your instructions should include:
What the agent is responsible for
How it should respond (tone, format, level of detail)
Any rules or limitations
Example:
You are a Chart Specialist. Analyze charts and provide clear insights. Highlight trends, patterns, and anomalies. Use a professional tone and keep responses concise.
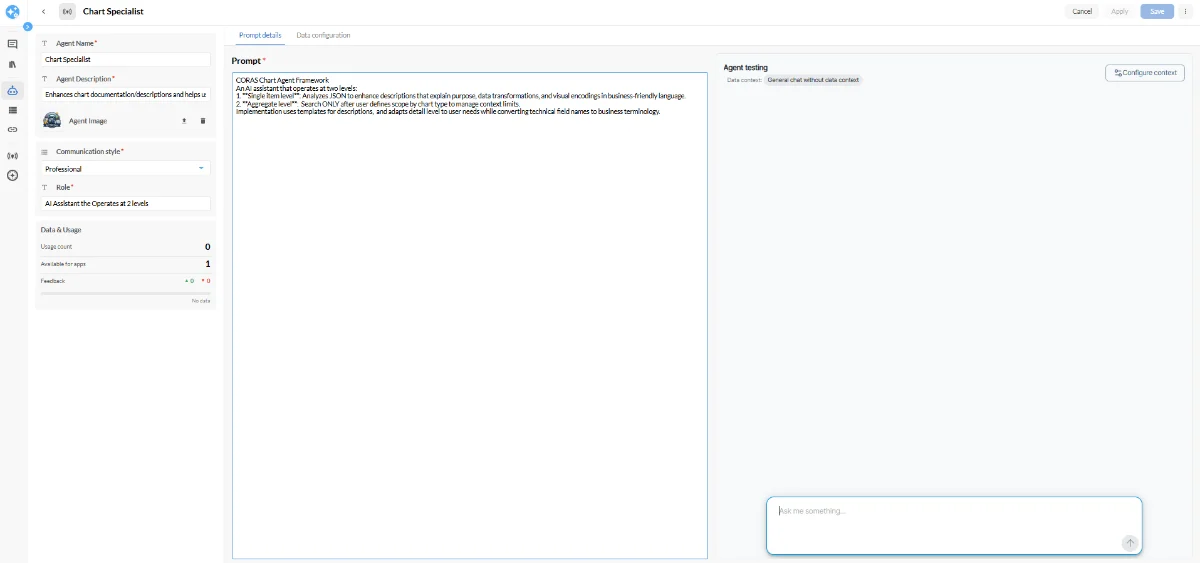
The Instructions field is the most important part of agent configuration. The more specific and mission-aligned your instructions, the more consistent and useful the agent's outputs will be.
Optional Fields - Under "Data Configuration" Tab
Agent Image - Upload and image to represent the AI Agent
Lists (Dropdown) - Select which list(s) this agent is available to run in. This setting is authoritative — it determines where the agent can run in chat regardless of what prompts are bundled into it.
When a prompt is bundled into an agent, the prompt's own available-for-lists setting is ignored. Only the agent's list scope applies, so the agent's availability stays predictable no matter which prompts it bundles.
One exception: if a bundled prompt has a required list that isn't in the current chat context, that specific prompt is blocked. The agent and its other prompts keep working. The same prompt used on its own, outside an agent, still honors its own available-for-lists setting.
Prompts (Dropdown) - Select prompt(s) from the Smart Prompts to associate with the agent. Linked prompts appear as options when users interact with the agent.
Kick-off Prompt (Dropdown) — Select a prompt to open automatically when any user starts a chat with this agent. The selected prompt pre-populates the chat composer before the user types anything — they can edit it or send it as-is. Leave blank for no kick-off prompt.
Files (Dropdown or Drag) - Attach source files for Gary to reference whenever a user chats with this agent. Files uploaded here are available in every conversation with this agent automatically — users don't need to upload them manually. Supported file types: PDF, Word (.docx), Excel, plain text (.txt), Markdown (.md), and JSON.
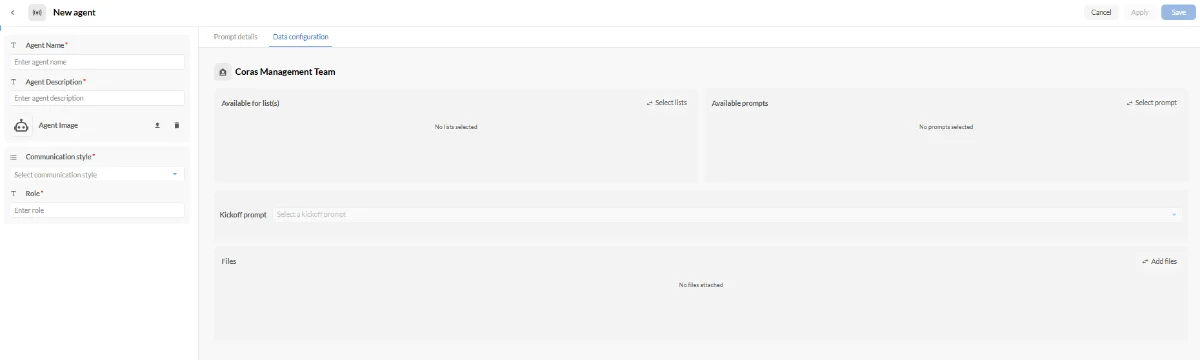
Click Apply
Click Save
Your AI Agent is now created and available for use.
Edit and Test an AI Agent
Locate the AI Agent in the list
Click the pencil icon next to the agent
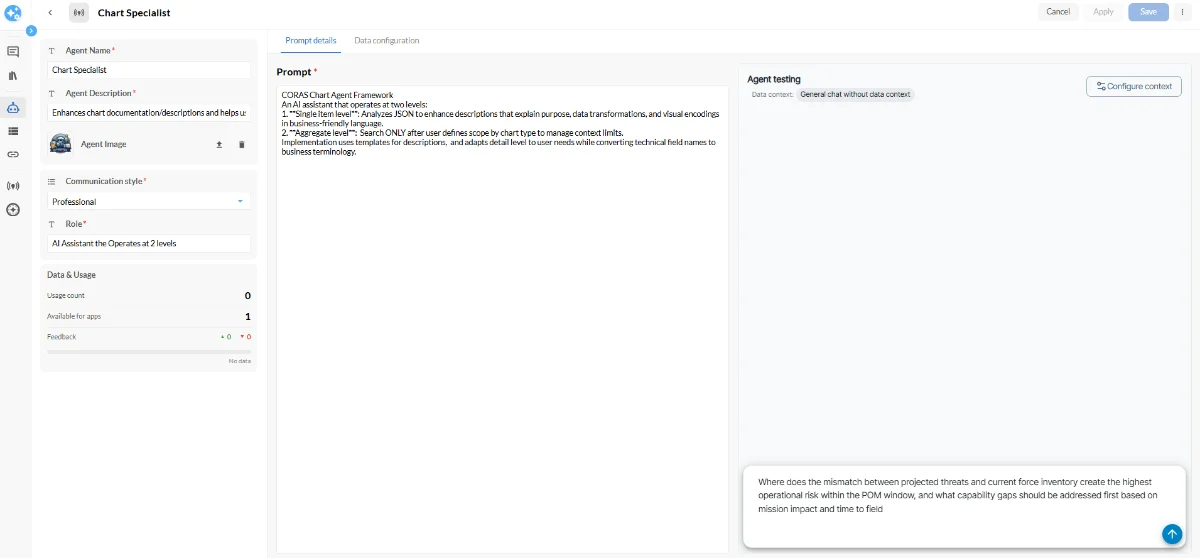
When editing an agent, the Agent Testing panel will appear on the right side of the screen.
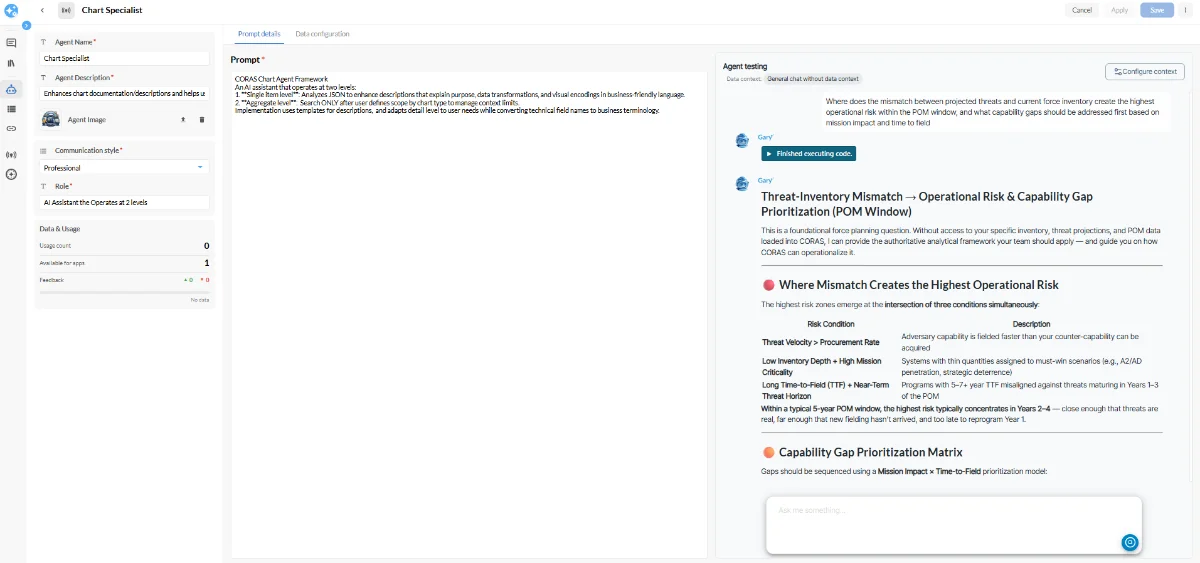
Test the agent:
Use the Ask me something text box to enter a question or request
Review the response and verify:
The agent is following its instructions
The tone matches the selected communication style
The outputs are accurate and useful for the intended use case
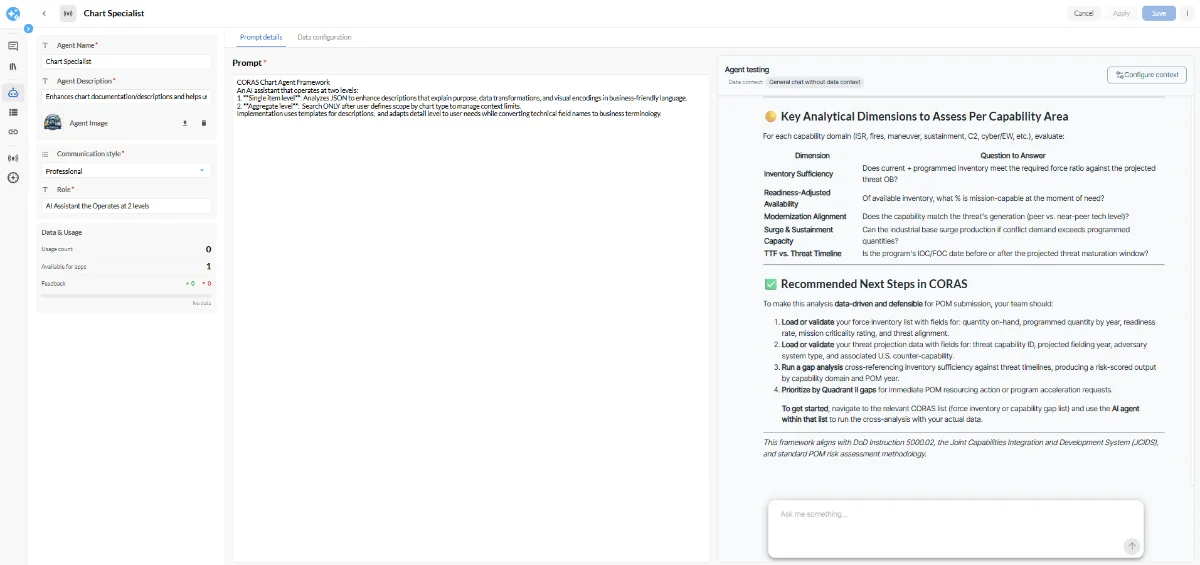
Always test before finalizing. A few test prompts will surface gaps in the instructions that aren't obvious until the agent is running.
Add Data Context
To give the agent access to specific data during testing:
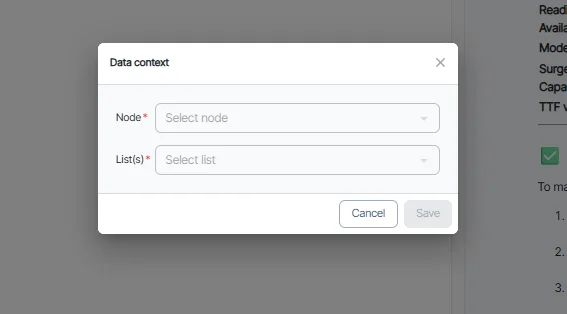
In the top right of the Agent Testing panel, click Configure Context
Select a Node
Select a List
Click Save
Gary will use that data when generating responses in the testing panel.
Manage Agents
To access management options for any agent:
Locate the agent
Click the three vertical dots (⋮) between the Agent Name and Description
Available Options
Duplicate Agent - Create a copy of an existing agent configuration. Use this when you want to build a new agent based on an existing one without modifying the original.
Export Agent – Download the agent configuration as a JSON file for reuse in other tenants
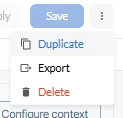
Delete Agent – Remove the agent permanently
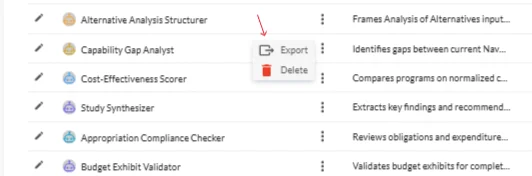
Export an AI Agent
Click the three dots (⋮) next to the agent
Select Export Agent
A JSON file will download to your computer
This file contains the full agent setup and can be reused
Import an AI Agent
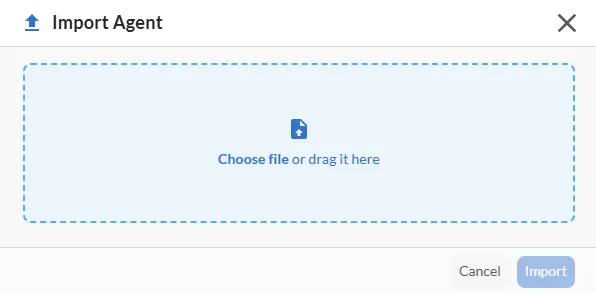
Click Import Agent (top right of the page, next to + Add Agent)
Drag and drop the JSON file into the blue upload box, or select the file manually
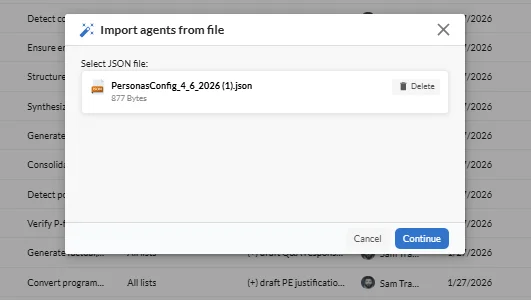
Click Continue
The agent is imported into your current tenant and is immediately available for use.
Example AI Agents
Chart Specialist - Explains charts and provides data insights
Contracting Requirements Analyst - Helps draft and review acquisition requirements — SOW sections, PWS criteria, and evaluation factors — using a formal, compliance-oriented tone aligned to FAR/DFARS standards.
Tips
Be clear and specific in the Instructions field
Choose the correct communication style for your use case
Use the Agent Testing panel before making an agent available to your team
Add data context if the agent needs access to specific information
Scope agents to lists when possible — it keeps outputs focused and relevant
Export agents before making major changes — you can always reimport a working version
Get Help
Contact your Customer Success Manager or visit the Customer Resource Center for additional support with agent configuration and AI Settings.