
PDF Area Map & Recognition
Why It Matters
If your team regularly pulls data from structured documents — contracts, reports, forms — into CORAS records, this replaces the manual entry step. Draw the areas, submit, review the results, and the data lands exactly where it belongs.
Desktop only. Drawing areas on a PDF requires a desktop browser. This feature is not available on mobile.
Before You Start
You need write access to the node where the recognized data will be stored.
Step 1 — Upload Your PDF


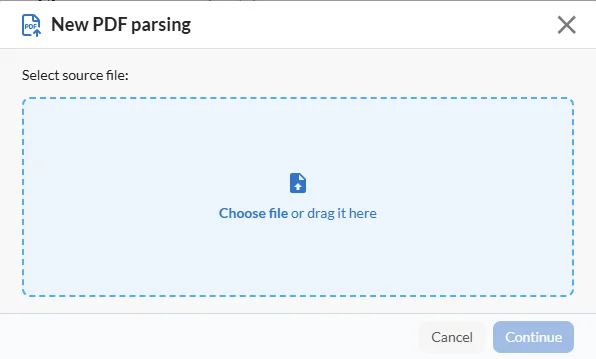
Open the PDF parsing tool.
Upload your PDF.
The document opens in the mapping view.
Step 2 — Draw Areas
Click and drag to draw a rectangle over any section of the PDF you want to capture. You can draw as many areas as needed — each one is mapped and processed independently.
For each area, set the type:
Text — captures the written content and maps it to a field on a CORAS record.
Image — captures the area as an image and saves it as an attachment.
Step 3 — Map Each Area to a Destination
For each area, choose where the recognized content will go.
Start by selecting a node. The node you select scopes the lists and records available as destinations. All areas in the session use the same node.
For text areas:
Select a list within the node.
Choose an existing record or create a new one.
Select the field the content will be written to.
If writing to an existing record, choose how to handle the field:
Append — adds the recognized content after anything already in the field.
Overwrite — replaces the field's current content.
For image areas:
Choose to attach the image to a record or directly to the node. If attaching to a record, select the list and record.
Creating a new record
If you create a new record as a destination, the record's title is pre-filled with the filename and a timestamp — for example, report-2026-07-27-14-30. You can edit the title before submitting.
Step 4 — Submit
Once all areas are mapped, click Submit. CORAS processes the document in the background — you don't need to stay on the page. You'll get an in-app notification when it's ready to review.
Step 5 — Review Results
When processing is complete, open the job from the notification or from your PDF Parsing Jobs list.
The review page shows the recognized content for each area. For each one:
Edit the value if the recognized text needs a correction.
Accept to confirm and write it to the destination field.
Reject to discard it — nothing is written to that field.
Request a higher-accuracy pass if the result isn't accurate enough. CORAS reprocesses the area using a more thorough recognition method and notifies you when it's done.
After a higher-accuracy pass, re-submission is no longer available for that area. Review, edit if needed, then accept or reject.

PDF Parsing Jobs
All of your parsing jobs are listed in PDF Parsing Jobs, which works like the ingestion log. Open any job to see its status and return to the review page.
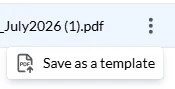
Each job in the list has a three-dot menu (⋮) with additional options:
Save as a template — saves the area-and-field mapping from this job as a reusable template. See Recognition Templates below.
Recognition Templates
If you regularly parse the same type of PDF — a monthly PMR, a recurring contract form, a standard report format — save the area-and-field mapping as a template so you don't have to redraw and remap every time.
Save a Template
Go to PDF Parsing Jobs.
Find the job whose mapping you want to reuse.
Click the three-dot menu (⋮) on that job.
Select Save as a template.
Give the template a name and save.
The template stores every area you drew and its mapped destination — field, record, write mode. It does not store the PDF content itself.
Use a Template
When you start a new PDF parsing job:
Upload your PDF.
Instead of drawing areas manually, select a saved template.
CORAS applies the saved areas and field mappings to the new document.
Review the area positions — if the new PDF has a different layout than the original, adjust any areas that don't align.
Submit as normal.
Tips
Templates work best on PDFs with a consistent structure — same form, same report format, same page layout.
If the source PDF changes its layout, reposition the areas before submitting rather than relying on the saved positions blindly.
Give templates descriptive names that include the document type and version so they're easy to identify later (for example: "Monthly PMR — Standard Format").