
Conditional Formatting
Conditional formatting applies automatic color coding to SmartList items based on field values — turning raw data into an at-a-glance status picture. When a status field turns red, yellow, or green based on defined rules, leadership can scan hundreds of items in seconds and focus attention where it matters.
Why This Matters
Color is the fastest signal. A readiness dashboard where delayed programs are red and on-track programs are green lets leadership scan hundreds of items in seconds without filtering or sorting.
Row-level formatting is more powerful than cell-level for leadership reviews — the entire row changes color, making exceptions immediately visible regardless of which column they're looking at.
"Is none of" conditions catch everything that hasn't reached a good state with a single rule — no need to flag every bad state individually.
When to Use This
Status visibility — Color-code program or task status so critical items stand out immediately without filtering or sorting.
Readiness dashboards — Apply row-level formatting so leadership sees a full-row highlight for any item that is delayed, at risk, or overdue.
Exception tracking — Use "is none of" conditions to surface everything that hasn't reached a completed or approved state.
Add a Conditional Format
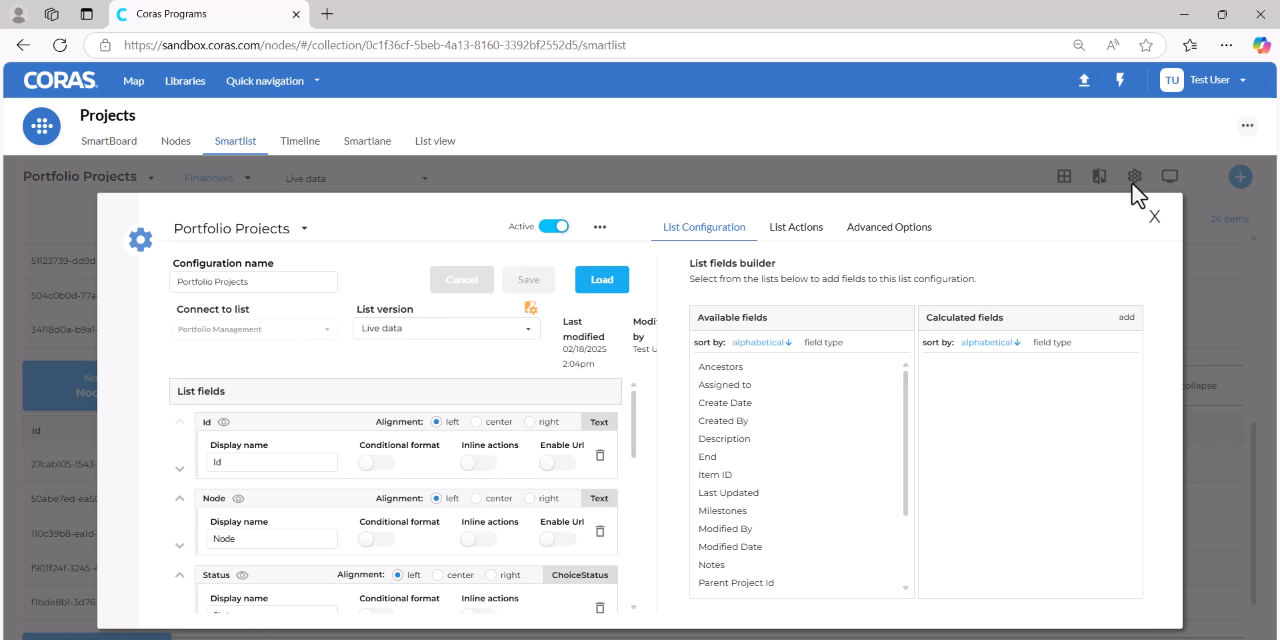
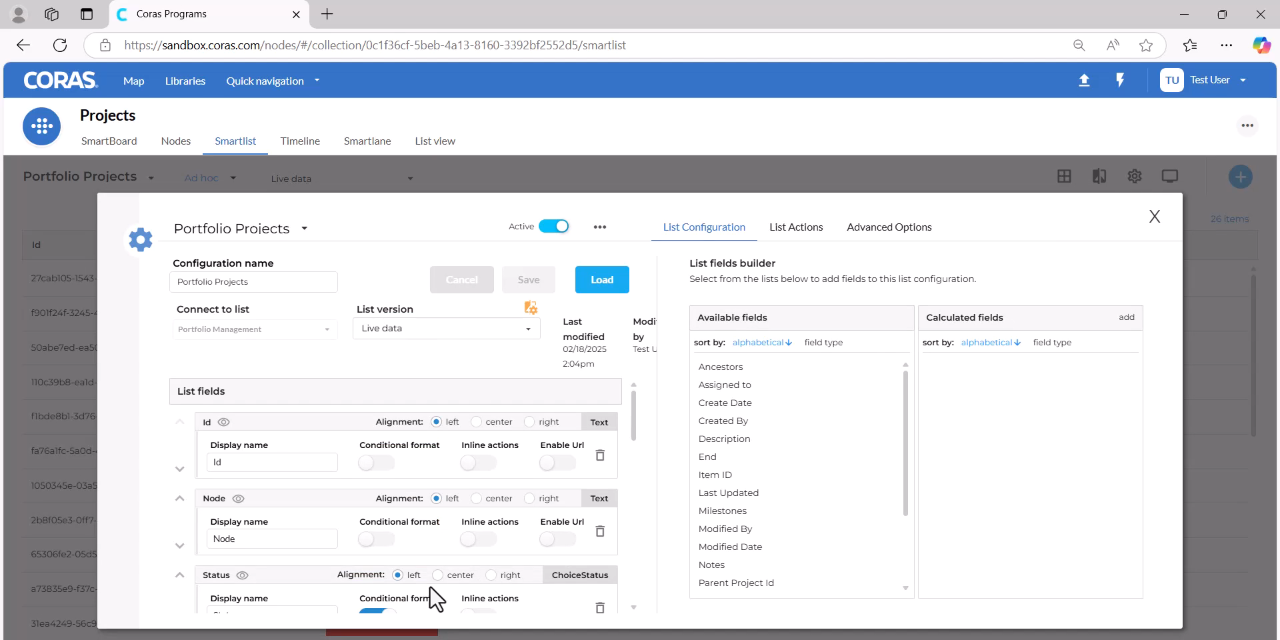
In the SmartList settings panel on the left, locate the field you want to format (e.g., Status).
Turn on the Conditional Format toggle for that field.
Click Add Conditional Format.
Set the Condition
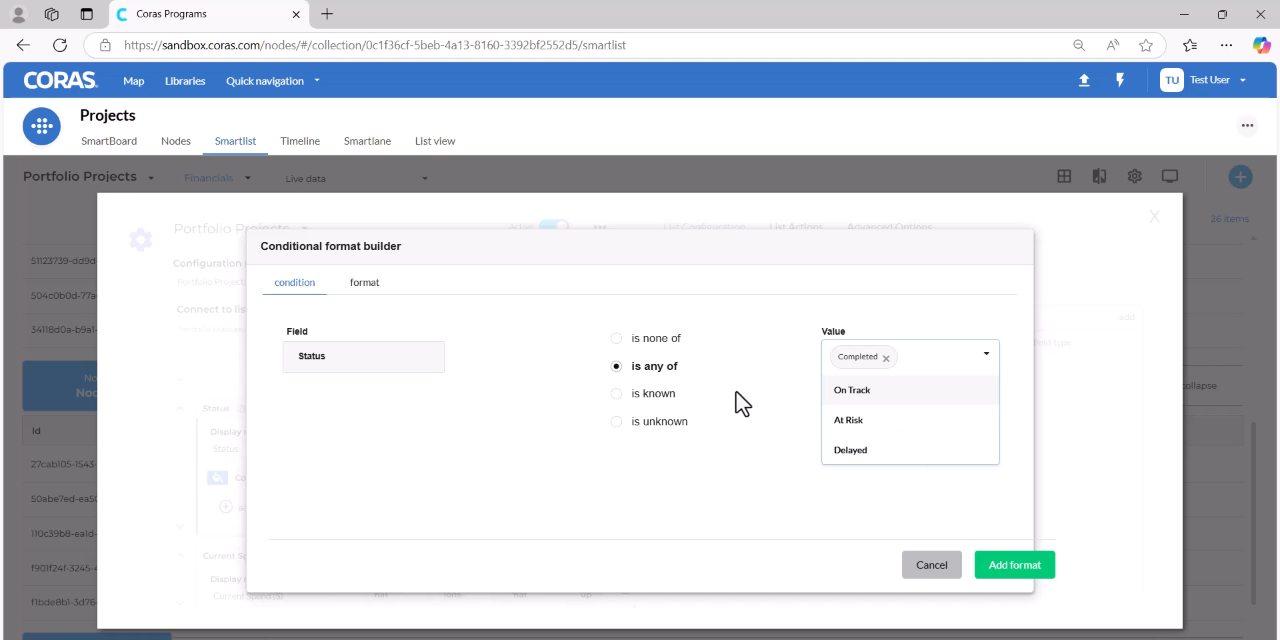
Select the condition type (e.g., is any of).
Choose the value to match (e.g., Completed).
Go to the Format section at the top
Click Background and select a color (e.g., green).
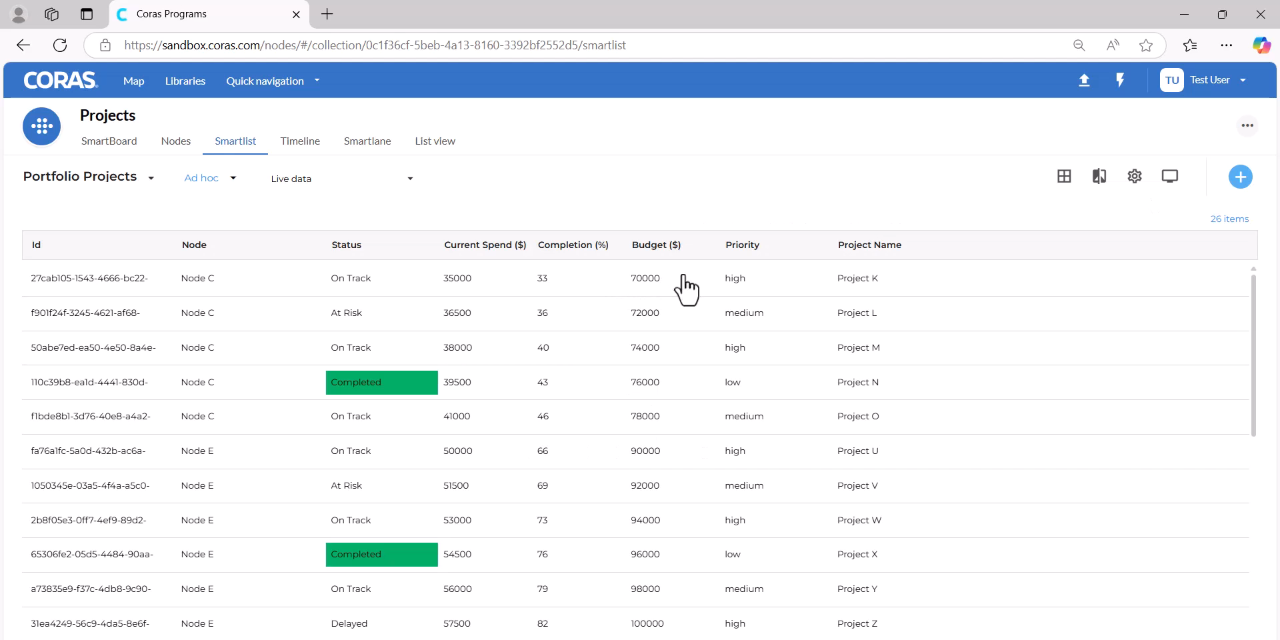
Click Add Format, then Load to apply
Add Multiple Conditions
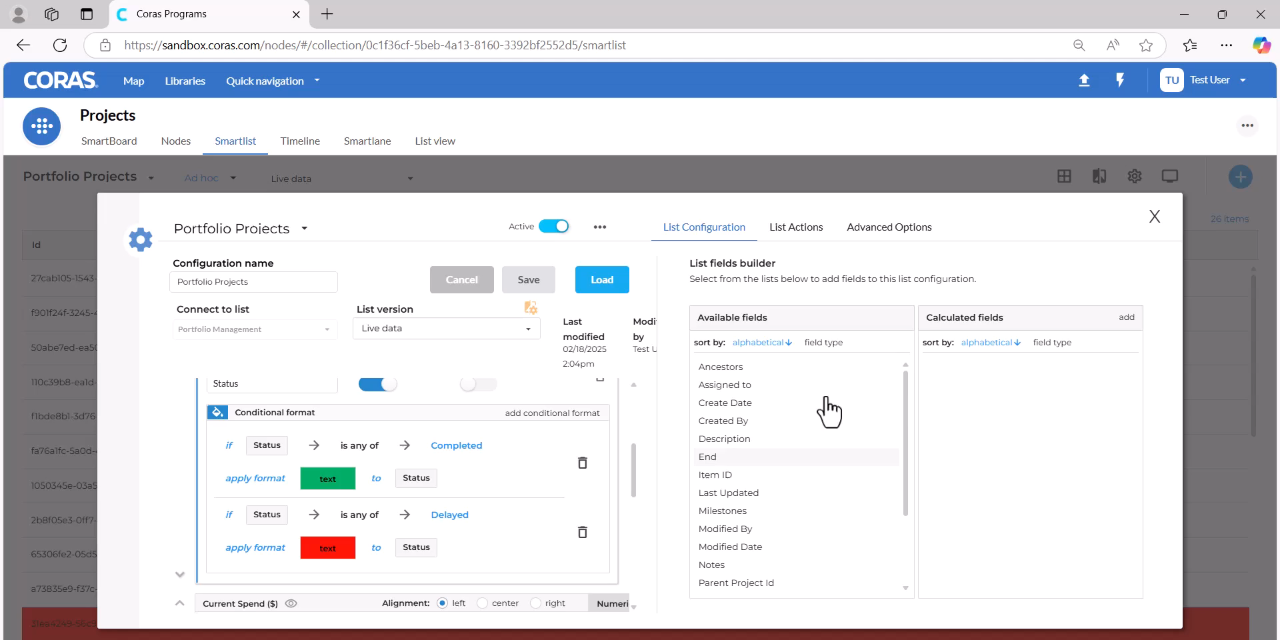
Scroll back to the Status field in the settings panel.
Click Add Conditional Format.
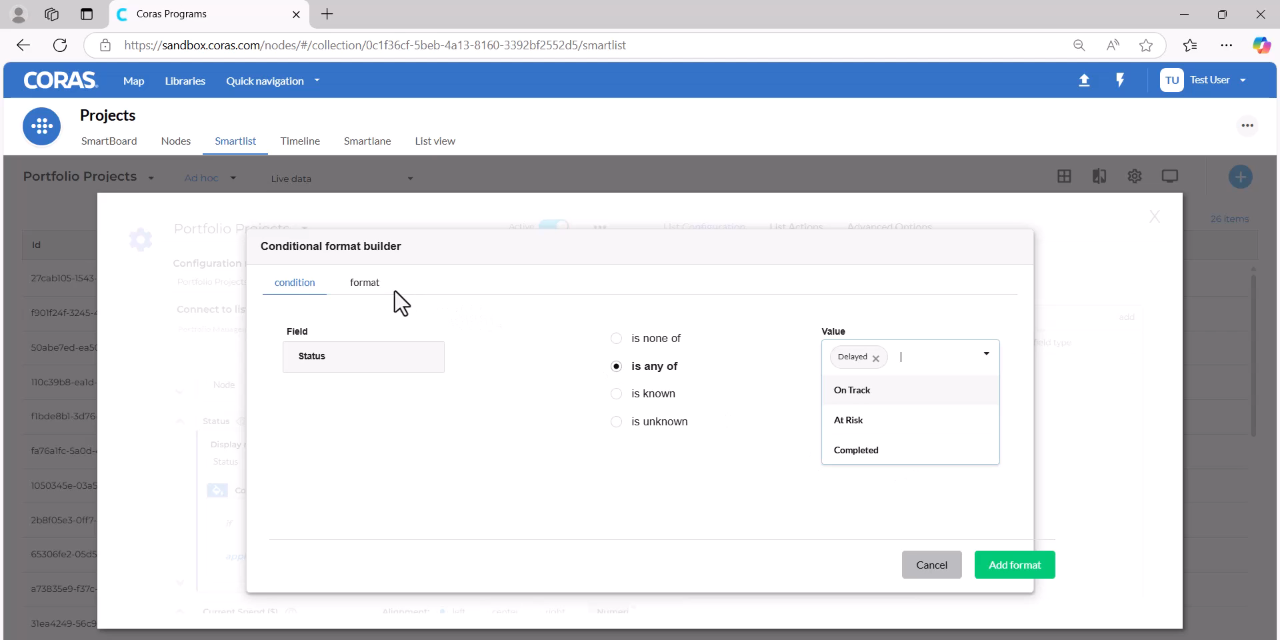
Set the condition (e.g., is any of > Delayed).
Select Background, then choose a color.
Click Add Format, then click Load
Repeat for each condition you want to cover.
Apply Formatting to a Field Cell or an Entire Row
By default, conditional formatting applies color to the matching field cell only. You can extend it to highlight the entire row instead.
Select the Apply to Row option to highlight the full row for matching items.
Click Add Format, then click Load.
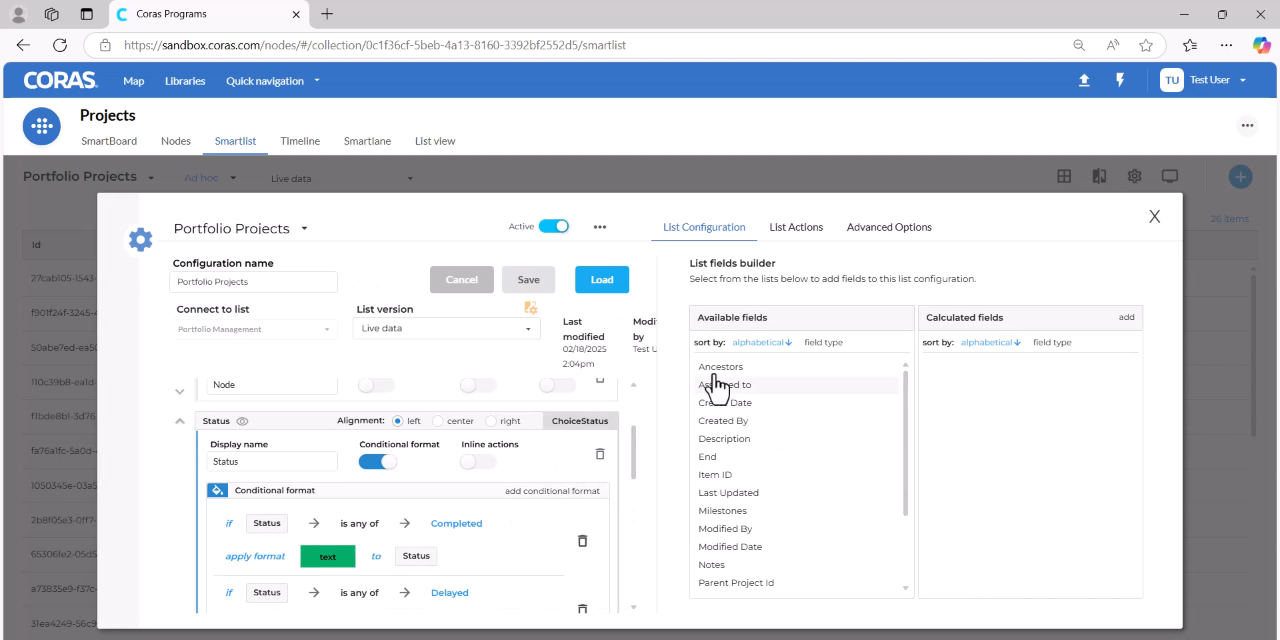
To apply to the field cell only: Turn off the row toggle. The color applies only to the matching status cell, not the full row.
Use "Is None Of" Conditions
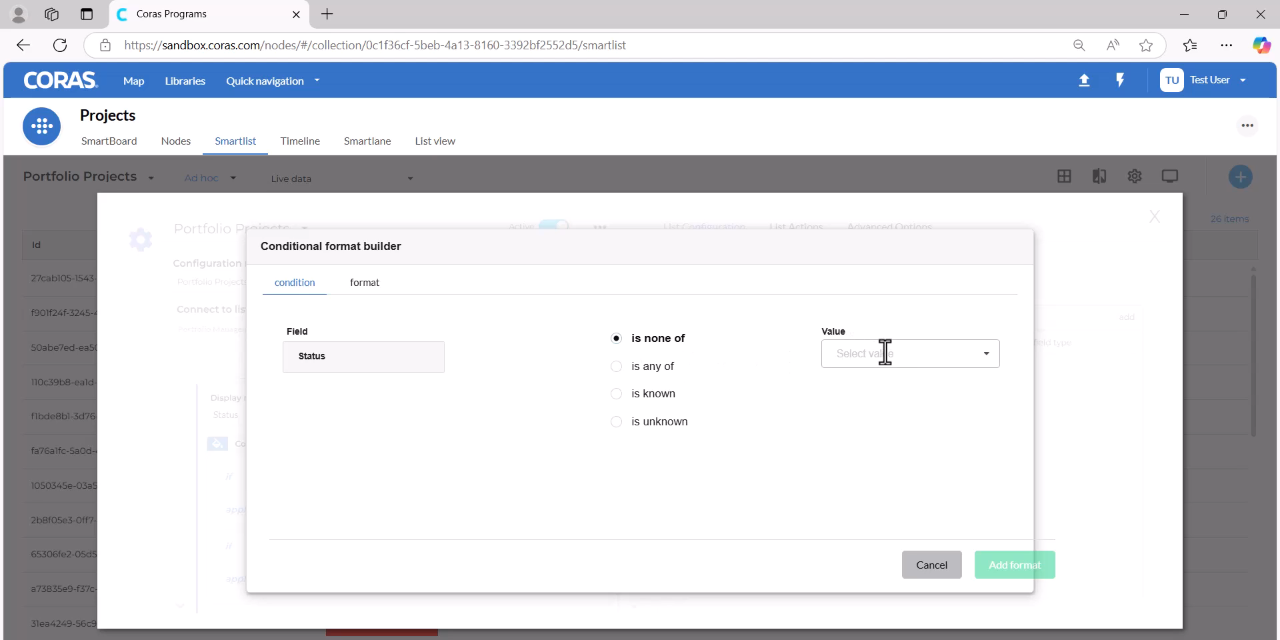
Use is none of to highlight everything that hasn't reached a specific state — useful for surfacing incomplete or unresolved items.
Click Add Conditional Format
Select is none of as the condition type
Choose the values to exclude — for example, Completed and Delayed
Select a background color — for example, orange
Click Add Format, then Load
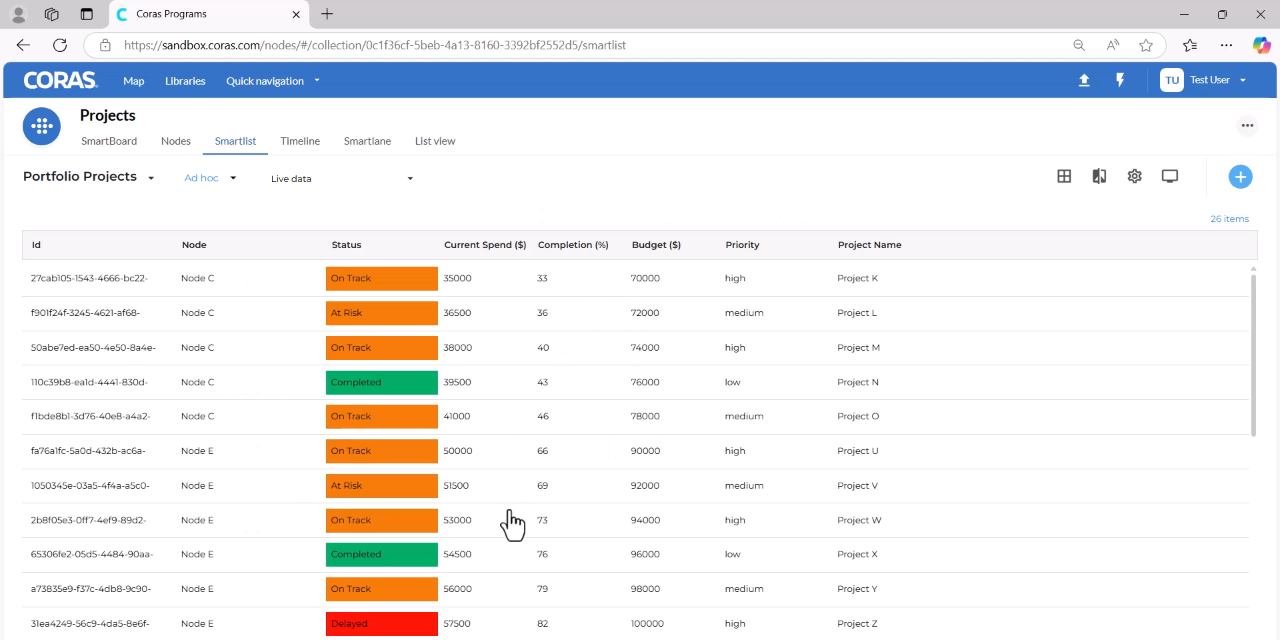
All items that are not Completed or Delayed — such as On Track and At Risk — will now be highlighted.
Remove a Conditional Format
Click the settings gear icon.
Scroll down to the field with the conditional format you want to remove.
Click the trash can icon on the right side of the format entry.
The conditional format is removed immediately.
Next Step
Ready to add inline actions, group rollups, and complex filters? See SmartLists — Advanced Configuration.